


Getting Started
Let’s say we have a simple file main.cpp under the directory chp1:
#include <iostream>
int main()
{
std::cout<<"你好"<<std::endl;
return 0;
}At the same time, we write a file CMakeLists.txt under chp1 with the following content:
cmake_minimum_required(VERSION 3.20)
project(chp1)
add_executable(chp1 main.cpp)Then we open a terminal, switch to the chp1 directory, and start the build. First, run the following command:
cmake -B build -S .You’ll see output similar to this:
-- The C compiler identification is AppleClang 14.0.3.14030022
-- The CXX compiler identification is AppleClang 14.0.3.14030022
-- Detecting C compiler ABI info
-- Detecting C compiler ABI info - done
-- Check for working C compiler: /Applications/Xcode.app/Contents/Developer/Toolchains/XcodeDefault.xctoolchain/usr/bin/cc - skipped
-- Detecting C compile features
-- Detecting C compile features - done
-- Detecting CXX compiler ABI info
-- Detecting CXX compiler ABI info - done
-- Check for working CXX compiler: /Applications/Xcode.app/Contents/Developer/Toolchains/XcodeDefault.xctoolchain/usr/bin/c++ - skipped
-- Detecting CXX compile features
-- Detecting CXX compile features - done
-- Configuring done
-- Generating done
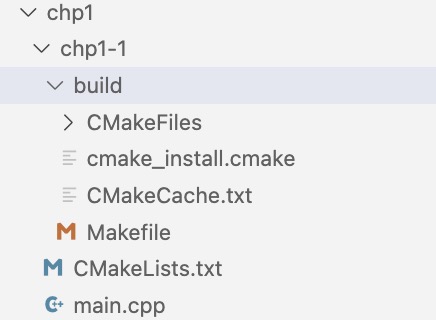
-- Build files have been written to: /xxx/chp1/chp1-1/buildAt this point, a new build directory will be created under chp1, containing some build information.
Then run the following command to compile:
cmake --build ./buildThe terminal will output something like:
 [ 50%] Building CXX object CMakeFiles/chp1.dir/main.cpp.o
 [100%] Linking CXX executable chp1
 [100%] Built target chp1
Now, an executable file is successfully generated in the build directory:
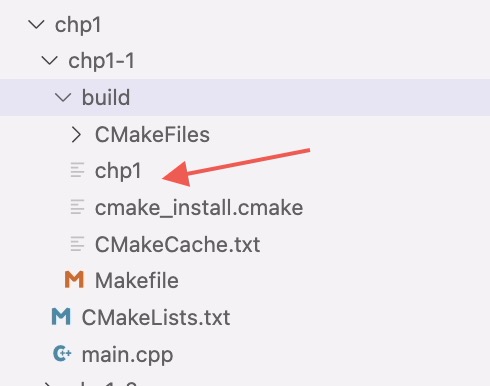
Run the executable to see the output:
 chp1-1 % ./build/chp1
 你好
And just like that, we’ve completed the build of our first C++ project using CMake.
CMake Version Management
The behavior of a project with respect to CMake versions is specified using the cmake_minimum_required() command. This should be the first line in your CMakeLists.txt file, so that CMake’s behavior is configured before anything else.
This command serves two purposes:
It specifies the minimum CMake version required by the project. If the version of CMake used is lower than specified, the build will stop with an error.
It ensures that CMake behaves according to the specified version.
The syntax is straightforward:
cmake_minimum_required(VERSION major.minor[.patch[.tweak]])The VERSION keyword is mandatory, and the major.minor parts are required. In most cases, patch and tweak are unnecessary, as new features usually appear in minor versions. You only need to specify patch when a specific bug fix is needed. Although CMake 3.x supports tweak, it is rarely needed in projects.
It's generally recommended to specify version 3.20 or higher.
project
Every CMake project should include a project() command, which should appear right after cmake_minimum_required().
The typical syntax is:
 project(projectName
        [VERSION major[.minor[.patch[.tweak]]]]
        [LANGUAGES languageName ...]
        )
The project name is required and can include letters, numbers, underscores _, and hyphens -. Letters and underscores are more common. Since spaces aren’t allowed, you don’t need quotation marks. The project name is used in the project generator (like Xcode or Visual Studio), as well as in default packaging names, documentation metadata, and more. projectName is the only required argument. VERSION is supported only in CMake 3.0 and above. CMake uses the version info to fill internal variables and metadata, but it has no further effect. The LANGUAGES argument defines which programming languages to enable in the project, such as C, CXX, Fortran, ASM, Java, Objective-C, and Objective-C++. If you specify multiple languages, separate them with spaces. If no languages are listed, CMake defaults to C and CXX.
Building an Executable
The add_executable() command tells CMake to create an executable from a set of source files.
The syntax is:
 add_executable(targetName [WIN32] [MACOSX_BUNDLE]
                [EXCLUDE_FROM_ALL]
                source1 [source2 ...]
                )
WIN32
On Windows, this option indicates that the executable should be built as a Windows GUI application. It uses
WinMain()instead ofmain(), and adds the/SUBSYSTEM:WINDOWSlinker option. This option is ignored on other platforms.MACOSX_BUNDLE
This triggers CMake to build an application bundle on Apple platforms, including macOS and iOS. The exact behavior differs across platforms. On macOS, for example, the app bundle has a specific directory structure. CMake also generates an
Info.plistfile. Non-Apple platforms ignore this option.EXCLUDE_FROM_ALL
When a project defines many targets, but only a few need to be built by default, use this option. It excludes the target from the default
ALLbuild (e.g.,ALL_BUILDin Xcode). The executable will only be built if explicitly requested or required by dependencies.
The targetName becomes the name of the executable and can include letters, numbers, underscores, and hyphens. When building, an executable with a platform-specific name will be created in the build directory.
You can define multiple executables by calling add_executable() multiple times with different names in CMakeLists.txt.
Generating the Project
cmake [<options>] -B <path-to-build> [-S <path-to-source>]Starting from CMake version 3.13, this form is recommended. Use -B to specify the build directory and -S to specify the source directory (where the top-level CMakeLists.txt is located).
In our example:
cmake -B build -S .This uses the current directory as the source and creates a build directory in the current location as the build output directory.
Building the Project
cmake --build <dir> [<options>] [-- <build-tool-options>]In the previous example, we used:
cmake --build ./buildThis indicates the build directory is ./build.
As you can see, generating and building the project is quite straightforward. The trickier part lies in how to control the build type (Debug or Release), which we’ll explain in more detail later.
If you're a frequent programmer, you might wonder: Is the compiled program a Debug or a Release version?
Actually, CMake determines this using the CMAKE_BUILD_TYPE variable. Modify the CMakeLists.txt as follows:
cmake_minimum_required(VERSION 3.20)
project(chp1)
if(CMAKE_BUILD_TYPE MATCHES Debug)
add_definitions(-DDEBUG)
else()
add_definitions(-DRELEASE)
endif()
add_executable(chp1 main.cpp)Which means:
Add the
DEBUGmacro if the build type isDebug.Add the
RELEASEmacro if the build type isRelease.
Also modify main.cpp:
#include <iostream>
int main()
{
#ifdef DEBUG
std::cout << "Debug version" << std::endl;
#elif defined(RELEASE)
std::cout << "Release version" << std::endl;
#else
std::cout << "Other version" << std::endl;
#endif
return 0;
}Compile and run:
 chp1-2 % cmake -B build -S .
 ...
 chp1-2 % cmake --build ./build
 ...
 chp1-2 % ./build/chp1
 Release version
As we can see, by default it builds a Release version.
To explicitly set the build type during project generation:
 chp1-2 % cmake -B build -S . -DCMAKE_BUILD_TYPE=Debug
 ...
 chp1-2 % cmake --build ./build
 [ 50%] Building CXX object CMakeFiles/chp1.dir/main.cpp.o
 [100%] Linking CXX executable chp1
 [100%] Built target chp1
 chp1-2 % ./build/chp1
 Debug version
So if we specify -DCMAKE_BUILD_TYPE=Debug, it correctly builds the Debug version.
In the above examples, we didn’t explicitly specify a generator. CMake used Unix Makefiles by default. You can check available generators with:
chp1 % cmake --help
...
Generators
The following generators are available on this platform (* marks default):
* Unix Makefiles = Generates standard UNIX makefiles.
Ninja = Generates build.ninja files.
Ninja Multi-Config = Generates build-<Config>.ninja files.
Watcom WMake = Generates Watcom WMake makefiles.
Xcode = Generate Xcode project files.
CodeBlocks - Ninja = Generates CodeBlocks project files.
CodeBlocks - Unix Makefiles = Generates CodeBlocks project files.
CodeLite - Ninja = Generates CodeLite project files.
CodeLite - Unix Makefiles = Generates CodeLite project files.
Eclipse CDT4 - Ninja = Generates Eclipse CDT 4.0 project files.
Eclipse CDT4 - Unix Makefiles= Generates Eclipse CDT 4.0 project files.
Kate - Ninja = Generates Kate project files.
Kate - Unix Makefiles = Generates Kate project files.
Sublime Text 2 - Ninja = Generates Sublime Text 2 project files.
Sublime Text 2 - Unix Makefiles
= Generates Sublime Text 2 project files.
These are the generators supported on my Mac. On the official documentation, we find the following:
CMake Generators
Command-Line Build Tool Generators
These generators support command-line build tools. In order to use them, one must launch CMake from a command-line prompt whose environment is already configured for the chosen compiler and build tool.
Makefile Generators
Ninja Generators
IDE Build Tool Generators
These generators support Integrated Development Environment (IDE) project files. Since the IDEs configure their own environment one may launch CMake from any environment.
Visual Studio Generators
Other Generators
Extra Generators
Deprecated since version 3.27: Support for "Extra Generators" is deprecated and will be removed from a future version of CMake. IDEs may use the
cmake-file-api(7)to view CMake-generated project build trees.Some of the CMake Generators listed in the
cmake(1)command-line tool--helpoutput may have variants that specify an extra generator for an auxiliary IDE tool. Such generator names have the form<extra-generator> - <main-generator>. The following extra generators are known to CMake.
The most commonly used generators are:
Visual Studio
Xcode
Ninja
Unix Makefiles
What Is a Multi-Config Generator?
Generators also introduce a new concept: multi-config. You’ve likely used it in IDEs like Visual Studio or Xcode, where you can switch between Debug and Release modes. This means these generators support multiple build configurations.
Generators that support multi-config include:
Ninja Multi-Config
Visual Studio
Xcode
Let’s try using Xcode to test how the build type is detected.
 chp1-2 % cmake -B build -S . -GXcode
 ...
 chp1-2 % cmake --build ./build
A Debug directory will be created under build, containing the executable:
 chp1-2 % ./build/Debug/chp1
 Debug version
Now delete the build directory and try specifying the build type:
 chp1-2 % cmake -B build -S . -DCMAKE_BUILD_TYPE=Release -GXcode
 ...
 chp1-2 % cmake --build ./build
 ...
Strangely, the executable in the Debug directory outputs "Release version".
 chp1-2 % ./build/Debug/chp1
 Release version
This is because with multi-config generators, the actual build type is not controlled by CMAKE_BUILD_TYPE, but by CMAKE_CONFIGURATION_TYPES. CMAKE_BUILD_TYPE is ignored.
Let’s try the following command:
cmake -B build -S . -GXcodeThen check CMakeCache.txt in the build directory. You’ll notice:
There is no entry for
CMAKE_BUILD_TYPEThere is an entry like:
CMAKE_CONFIGURATION_TYPES:STRING=Debug;Release;MinSizeRel;RelWithDebInfo
Whereas if we run:
cmake -B build -S .The CMakeCache.txt will contain:
 //Choose the type of build, options are: None Debug Release RelWithDebInfo
 // MinSizeRel ...
 CMAKE_BUILD_TYPE:STRING=
This shows:
For non-multi-config generators, the build type is controlled by
CMAKE_BUILD_TYPE, andCMAKE_CONFIGURATION_TYPESis ignored.For multi-config generators, the build type is controlled by
CMAKE_CONFIGURATION_TYPES, andCMAKE_BUILD_TYPEis ignored.
So we need to modify our CMakeLists.txt like this:
cmake_minimum_required(VERSION 3.20)
project(chp1)
# if(CMAKE_BUILD_TYPE MATCHES Debug)
# add_definitions(-DDEBUG)
# else()
# add_definitions(-DRELEASE)
# endif()
add_executable(chp1 main.cpp)
# Add this compile definition for debug builds, this same logic works for
# target_compile_options, target_link_options, etc.
target_compile_definitions(chp1 PRIVATE
$<$<CONFIG:Debug>:DEBUG=1>
$<$<CONFIG:Release>:RELEASE=1>
)The<<xxx>:yyy> expression is something we’ll explain later. For now, just understand that:
If
CONFIGisDebug, then defineDEBUG=1If
CONFIGisRelease, then defineRELEASE=1Otherwise, define nothing
For multi-config generators, you can specify default configurations via CMAKE_CONFIGURATION_TYPES, and use --config to select the actual one during build.
Testing CMAKE_CONFIGURATION_TYPES
Default config behavior
 chp1-2 % cmake -B build -S . -GXcode -DCMAKE_CONFIGURATION_TYPES="Release;Debug"
 ...
 chp1-2 % cmake --build ./build
 ...
 chp1-2 % ./build/Debug/chp1
 Debug version
Only a
Debugdirectory is generated. This suggests that Xcode defaults to Debug. Let’s try the same with Ninja Multi-Config:chp1-2 % cmake -B build -S . -G"Ninja Multi-Config" -DCMAKE_CONFIGURATION_TYPES="Release;Debug" ... chp1-2 % cmake --build ./build [2/2] Linking CXX executable Release/chp1 chp1-2 % ./build/Release/chp1 Release versionDifferent generators default to different configurations. So it’s best to explicitly specify the config with
--config.Using
--configexplicitly
 chp1-2 % cmake -B build -S . -GXcode -DCMAKE_CONFIGURATION_TYPES="Release;Debug"
 ...
 chp1-2 % cmake --build ./build --config Release
 ...
 chp1-2 % ./build/Release/chp1
 Release version
only Release directory is generated under build directory. An executable is generated under Release directory.
Now run the command:
 chp1-2 % cmake --build ./build --config Debug
 ...
 chp1-2 % ./build/Debug/chp1
 Debug version
With multi-config generators, you can switch build targets freely.
Single config in
CMAKE_CONFIGURATION_TYPES
 chp1-2 % cmake -B build -S . -GXcode -DCMAKE_CONFIGURATION_TYPES="Release"
 ...
 chp1-2 % cmake --build ./build --config Debug
 ...
 chp1-2 % ./build/Release/chp1
 Release version
 chp1-2 % cmake --build ./build --config Release
 ...
 chp1-2 % ./build/Release/chp1
 Release version
Only one config (
Release) is valid, so--configis ignored.Setting
CMAKE_CONFIGURATION_TYPESin single-config
chp1-2 % cmake -B build -S . -G"Unix Makefiles" -DCMAKE_CONFIGURATION_TYPES="Release;Debug" -DCMAKE_BUILD_TYPE="Release" ... CMake Warning: Manually-specified variables were not used by the project: CMAKE_CONFIGURATION_TYPES This confirms that
CMAKE_CONFIGURATION_TYPESonly works with multi-config generators, just likeCMAKE_BUILD_TYPEonly works with single-config.
Summary of Multi-Config
The available configurations in multi-config generators are defined by
CMAKE_CONFIGURATION_TYPES. By default, this includesDebug,Release,RelWithDebInfo, andMinSizeRel. You can override this using-DCMAKE_CONFIGURATION_TYPES=xxx.Use
--configduring the build to explicitly choose the configuration. Only values listed inCMAKE_CONFIGURATION_TYPESwill take effect.Different generators have different default configurations when
--configis not used. Therefore, you should avoid relying on default behavior and always specify it explicitly.CMAKE_CONFIGURATION_TYPESonly works in multi-config mode, just likeCMAKE_BUILD_TYPEonly works in single-config mode.
Combined Configuration
A single-config setup means the project is built for only one configuration, and the type is decided during project generation. A multi-config setup means the generated project supports multiple configurations, and the actual one is chosen at build time via --config.
Currently, only Visual Studio, Xcode, and Ninja Multi-Config are multi-config generators. All others are single-config.
Key Takeaways:
CMake supports both single-config and multi-config generators.
In single-config mode, use
CMAKE_BUILD_TYPEduring generation to control the build type. In multi-config mode, useCMAKE_CONFIGURATION_TYPESduring generation and--configduring build.Since default behavior varies across generators, it’s best to explicitly specify the configuration you want.
In single-config builds, we use:
 if(CMAKE_BUILD_TYPE MATCHES Debug)
     add_definitions(-DDEBUG)
 else()
    add_definitions(-DRELEASE)
 endif()
In multi-config builds, we use:
 target_compile_definitions(chp1 PRIVATE
     $<$<CONFIG:Debug>:DEBUG=1>
     $<$<CONFIG:Release>:RELEASE=1>
 )
But how do we write code that works in both?
CMake provides a read-only variable GENERATOR_IS_MULTI_CONFIG to detect the generator type. So we can write:
 if(GENERATOR_IS_MULTI_CONFIG)
     target_compile_definitions(chp1 PRIVATE
         $<$<CONFIG:Debug>:DEBUG=1>
         $<$<CONFIG:Release>:RELEASE=1>
     )
 else()
     if(CMAKE_BUILD_TYPE MATCHES Debug)
         add_definitions(-DDEBUG)
     else()
         add_definitions(-DRELEASE)
     endif()
 endif()
That way, macro definitions work correctly for both config types.
Also note that when building in Release mode, CMake automatically defines the macro NDEBUG, so you can use it in your code to detect release builds accurately.
Conclusion
When using CMake to generate and build your projects, always distinguish between single-config and multi-config modes. These modes control how the final executable is configured, and confusing them can easily lead to mismatches between the expected and actual performance of your program.

评论区